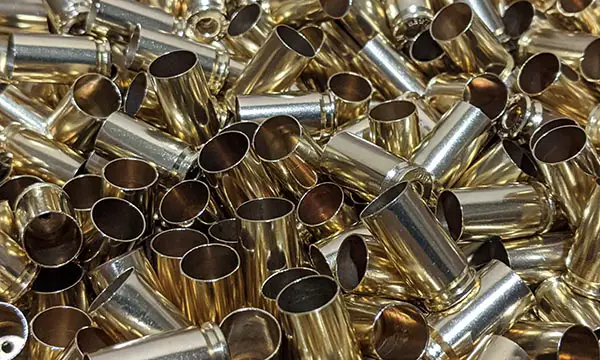
Dirty brass casings are abhorrent. Nevertheless, they are a necessity if you are going to reload your own ammunition – unless of course you begin with shiny casings you purchased. However, you first need to clean dirty brass in order to use it for reloading. I’m not much for dry media, so today I’m going cover how to clean brass casings with a rotary tumbler. After reading this article you will be able to turn your spent brass into shiny casings that look like they came from the factory!
Regardless of whether you reload because of an ammo shortage, find it more cost effective, or just do it for fun, if you want to get truly shiny brass, here’s a summary of the methodology:
- Deprime (decap) spent casings
- Run casings through wet tumbler
- Separate tumbling media from brass casings
- Rinse excess soap/cleaner off of brass
- Dry your casings
- Enjoy your shiny brass and get to reloading!
Table of Contents
What Is A ReloadingTumbler?

Frankford Arsenal Wet Rotary Tumbler
A reloading tumbler is a device used to spin or jostle used brass casings along with a cleaning agent and media in order to remove contaminants. Tumblers clean casings and prep your brass for the reloading process. There are two different types of tumblers; wet and dry.
As the name implies, wet tumblers rely on the use of water during the cleaning process. Wet tumblers use steel pins as the cleaning media. However, some form of cleaning and/or polishing agent is usually added to the tumbler along with the cleaning media.
One example of a wet tumbler is the Frankford Aresenal Rotary Tumbler – on Amazon, affectionally referred to as “FART” for short. This is the tumbler that I use to clean my spent casings for reloading.
Alternatively, you can use a dry media tumbler which relies on corncob or walnut media to clean brass. Dry media tumblers are also called “vibratory” tumblers since they do not spin. I personally believe wet tumblers are superior for cleaning brass, but to each their own.
Decap Brass Casings For Clean Primer Pockets
Deprime brass casings before loading into the tumbler to ensure clean primer pockets.
Regardless of how many cycles you plan to run brass through your tumbler, at some point you’ll need to deprime your casings. I prefer to decap my brass casings up front to ensure my primer pockets are good and clean. Occasionally, I’ll wash a casing that isn’t usable but it is rare.
Instead of using my press, I use the Frankford Arsenal Hand Deprimer tool. This saves my dies and reloading equipment and is super easy to use. Not to mention it’s portable. I can deprime my brass while sitting in front of the TV and watching a movie.
Shiny casings are pretty to look at. But if you’re going to clean your brass casings with a tumbler then it should be functionally clean as well as aesthetically pleasing.
Some people prefer to wash their brass before de-priming and then again with an exposed primer pocket. However, I have found that brass isn’t noticeably cleaner or shinier with multiple cycles. Therefore, I opt to deprime up front.
What Cleaner To Use With A Tumbler
So far, we’ve covered how a tumbler operates and preparing to clean your brass with a tumbler. But other than the media, what do you use to clean the brass? Each reloader has their own recipe for what works the best.
To get my brass really shiny, I add a 1/4 tsp of LemiShine and 3 tbsp. of Dawn dish soap into my tumbler. My tumbler is capable of cleaning up to 1000 casings at a time. If you have a smaller tumbler, you’ll need to adjust how much of each cleaning agent you use. Thus, if 500 the limit of brass casings you can clean with your tumbler, just halve the cleaning ingredients.
Alternative Cleaning Agents For Tumbling Brass
My cleaning concoction isn’t the be all end all of recipes. However, I do think that Lemishine is a fairly cost effective solution for producing shiny brass. For example, my 24 ounce container of lemishine cost me about $12 at my local Walmart. Using Google conversion of ounces to teaspoons I get 144 teaspoons. Multiply this by 4 — for the 1/4 tsp I use per 1000 casings — and extrapolated data says I can clean 500,000+ casings! It’s actually more expensive to buy the soap.
If this is still too expensive, I’ve read that you can also use citric acid which is the active ingredient in Lemishine. Alternatively, you can use polishers and cleaners touted specifically for cleaning brass. Flitz, Frankford, and Lyman make these types of products. Some are made to be used with dry tumblers while others can be used in wet or dry tumblers. Feel free to experiment, but above is what I use to clean brass casings in my tumbler.
How Long To Wash Brass Casings With A Tumbler
It’s worth reading the tumbler manufacturers recommendations for how long to tumble wash your brass. For the Franklin Rotary Tumbler, washing time depends on the number of cases your are cleaning.
For any amount under 500 Frankford recommends 1-2 hours of tumbling. However, for anything above 500 casings, the recommended wash time is 2-3 hours. Generally, I wash my brass for 3 hours regardless of how many cases I put in the tumbler.
How Many Casings Can I Wash In My Tumbler?
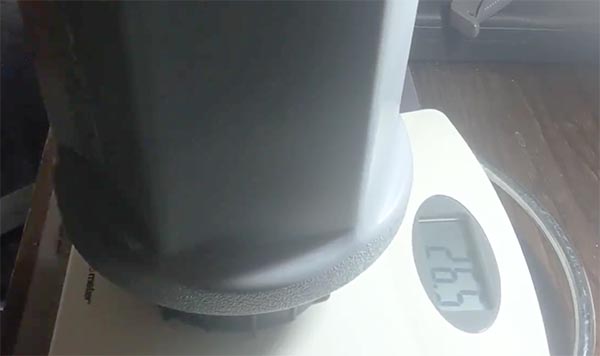
Fully loaded tumbler on scale prior to starting the wash cycle.
Ok, but how many casings can I wash at once? The number of casings you can wash at once depends on a number of factors. First is the size of the individual casings you’ll be washing impact the quantity you can wash. Handgun cases are significantly smaller than rifle casings.
But more importantly, you should adhere to the manufacturers’ weight limitations when deciding how many casings you can wash at once. Overfilling your tumbler can result in brass that isn’t as clean and shiny at best, or a broken tumbler at worst.
Using my Frankford Rotary Tumbler as an example, I cannot exceed 30 lbs for the total contents of the tumbler. Therefore, I can only wash a quantity of brass that doesn’t exceed 30 lbs when combined with both the tumbling media (5 lbs of steel pins) and water.
Rinsing Your Brass Casings Helps Them Shine
When you clean brass with a tumbler, your journey doesn’t end with the tumbling cycle. Afterwards, you need to separate the tumbling media from the freshly cleaned casings. Next, you will want to rinse the brass to remove any lingering suds or residue from your cleaning solution.
Dirty water after tumbling brass cases
It’s important to separate the brass from the dirty water as soon as possible. Allowing the clean brass to sit in dirty water can cause discoloration and undo all your hard work to get your brass nice and shiny.
Steps For Rinsing Your Brass After Tumbling
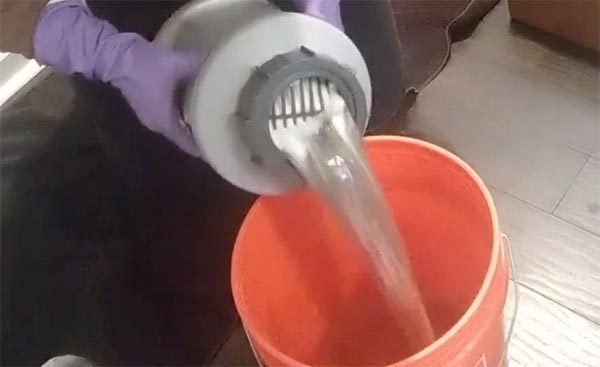
This step isn’t overly complicated, but can be a bit tedious. I use a 5 gallon bucket to dump out the dirty water and catch the steel media. Next, I carefully drain out the nasty water making sure I don’t dump the reusable steel pins.
Afterwards, I refill the 5 gallon bucket halfway with fresh water and dunk my FART into it and jostle until a majority of the media is gone and only shiny brass remains in the tumbling drum. Then, I carefully dump out the water and set my tumbling media aside.
Next, I dump the brass into the bucket and rinse with clean water. Finally, I carefully drain the water I use to rinse my brass before dumping the casings onto a towel.
How Long To Dry Your Casings After Tumbling
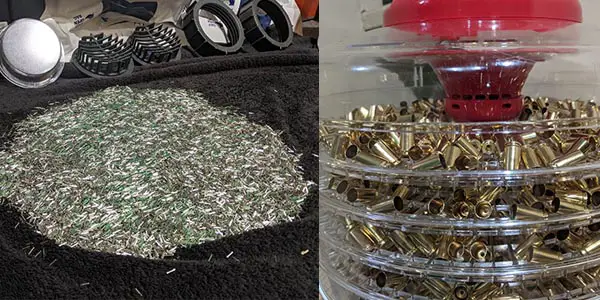
Separated media on towels and fully loaded parts dryer.
At this point, you’re approaching the final stage where you’ve finished cleaning your brass with a tumbler and need to dry it out. First use a towel to roll the casings around to separate any remaining media and soak up any standing water.
Afterwards, you’ll put your casings into your parts drying tray or the oven. I use the Hornady Digital Parts Dryer, but you can use a standard oven if that’s all you have available. Arrange the brass into a single layer on your trays.
Set the oven or your parts dryer to 140-160 degrees and dry your casings for 1 hour. There is no pre-heating necessary for the digital parts dryer, so I don’t believe you need to preheat the oven, though feel free to if you are overly cautious.
Parting Shots
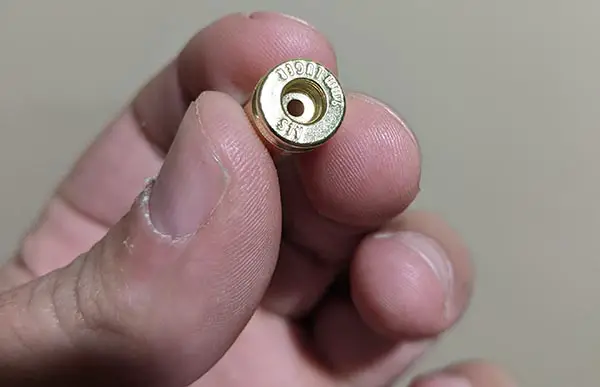
Final product: a freshly cleaned and shiny casing ready for reload.
In summary, if you want to get your spent casings bright and shiny like they’re new from the factory I highly recommend a wet tumbler. The process to clean brass with a tumbler is straightforward. However, you should monitor your brass and ensure you move to the next step in the process in a timely manner to produce the cleanest brass possible. If you found this article helpful, then please like, share and comment to help others in the community.


