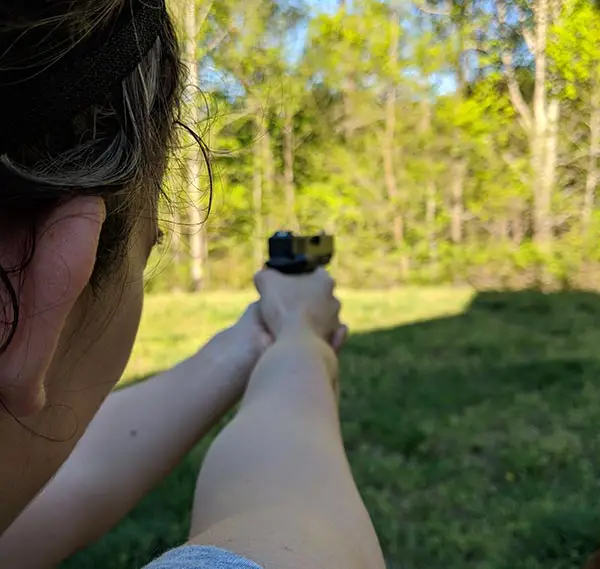
The system for aiming a pistol most commonly found on modern handguns consists of 3 dots. Many new shooters wonder how to aim a pistol with 3 dot sights? To aim a pistol with 3 dot sights, center the front sight dot between the two rear sight dots. Ensure the top of the front sight post aligns with the top of the rear sight. When done correctly, the three dots should be in a horizontal line and equally spaced apart. Your focal point is the dot on the front sight post, which should be placed on target.
Becoming proficient with this method of aiming will take time. However, once mastered you will be able to shoot accurately at distances sufficient for self defense with ease.
Table of Contents
Why Is It Important To Learn To Use A The Three-Dot Sight?
Many modern handguns, including some revolvers, come with the three-dot system of sighting from the factory. Of course, many shooters abandon this method immediately. Often opting for something more expensive and easier to use like a red-dot or a laser sight. However, if you don’t have that kind of money, a 3-dot sight may be your only option for a time.
Additionally, red-dot and laser sights rely on batteries. While the life of the batteries in these types of sights are extensive, they will eventually fail. Should this happen when you need your pistol most, you had better know how to aim without the technology.
Also, if you are at the range and testing out a friends handgun, or a rental, you may not have the luxury of an advanced aiming system. Therefore, you should be able to use the stock sights for aiming, which will allow you to evaluate the guns’ other traits without sacrificing accuracy.
Layout Of A 3 Dot Sight
The 3 dot system found on most pistols is a straightforward setup. On the front sight post there is a dot. Additionally, the rear sight consists of a cut out area with two posts that sit perpendicular to the barrel. On each post, there is a dot.
The dots are seldom larger than an 1/8th of an inch. However, the sizing of the dots and the gap of the cutout on the rear sight will vary from pistol to pistol. Furthermore, some pistols will have different colored dots for the rear and front sight dots. These 3 dot sights offer greater contrast when aiming down the gun. In addition, some pistols come equipped with a rail system that allows the 3 dot system to be easily replaced and/or customized.
Properly Aiming With A 3 Dot Sight
When aiming your pistol line up all 3 dots horizontally. Additionally, you want to make sure the tops of the 3 dots align as well. The lateral spacing of the dots should also be of equal distance. Proper alignment of the dots horizontally ensures your shot will not deviate left or right, while vertical alignment prevents the shot from missing the target high or low.
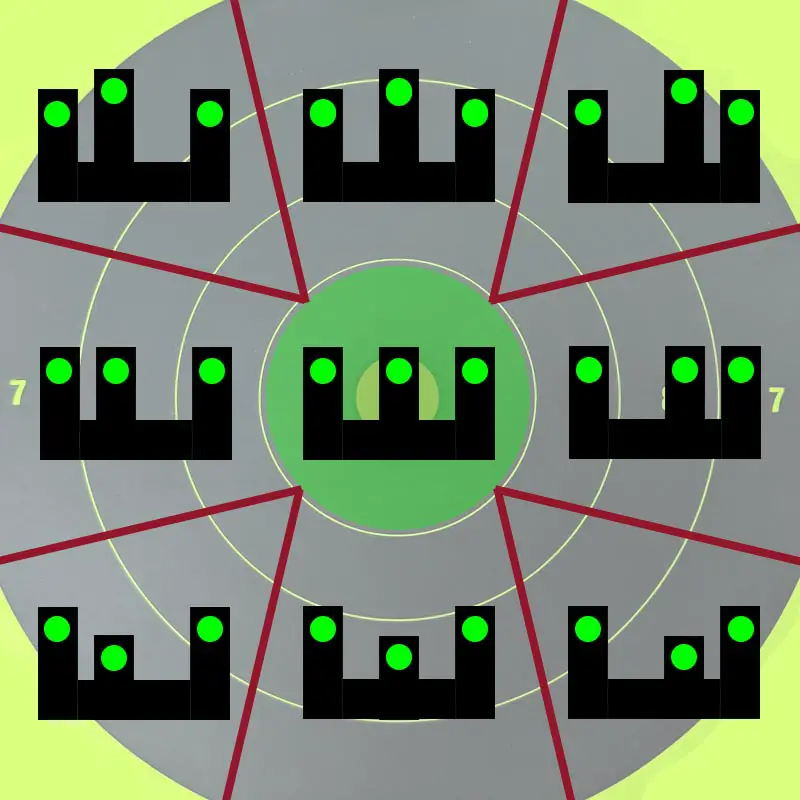
Many beginning shooters rely solely on the placement of the front sight dot in relation to the target. But ignoring the rear sight can lead to various problems with shot placement. Below is a diagram of where shots will land on the target if the sights are not properly aligned. Even if the front sight dot is on the bullseye, shots will deviate according to the relationship between the front dot and two rear dots.
The center image (outlined in green) is the proper sight picture. The other 8 remaining sight pictures denote where a shot will land in relation to the bullseye by their placement. Shot location is overly exaggerated in the below image.
Three Dot Sight Picture – Your Focal Point
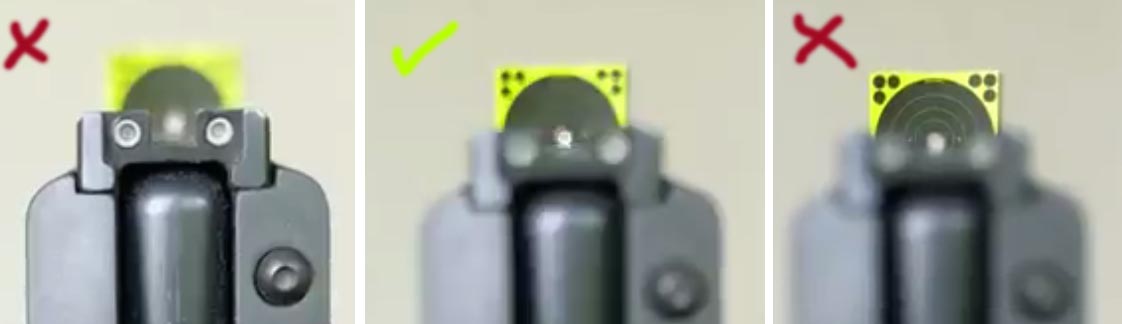
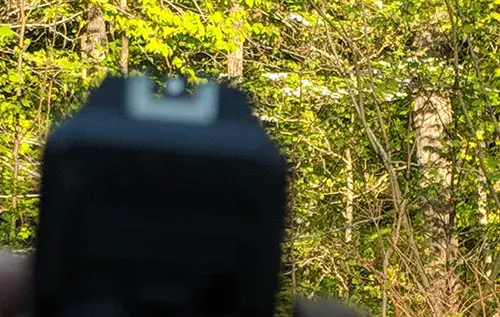
Finally, when shooting you will need to focus on the front sight post. Because your focal point will be the front sight dot, the rear dots will be slightly blurred. Additionally, the target will also be slightly blurry (see the image below).
The first image (from left to right) is an incorrect sight picture, because the rear dots are in focus. Similarly, the third image is also an incorrect sight picture because the target is in focus (you can see the target rings clearly). Finally, the center image is the correct sight picture. The target and rear sight dots are slightly blurred, but the front sight dot is in focus.
Aiming should be done with both eyes open. However, new shooters on the range may find it easier to close their non-dominant eye when aiming down the sights.
Determining Your Dominant Eye For Aiming
If you are not sure which is your dominant eye, there is a simple test to figure out which eye is taking precedence while aiming. With both eyes open, create a triangle with the thumb and index finger of each hand.
Next, find a stationary object and place the object in the center of the triangle. Finally, close one of your eyes. If the object remains in the triangle, then the open eye is your dominant eye. However, if the object is not in the center of the triangle, then the closed eye is your dominant eye.
For many, their dominant eye corresponds with their dominant hand. However, if you are right hand dominant and left eye dominant, then you are cross eye dominant. You may need adjust your shooting approach or sight picture slightly to accommodate for this.
Ensure you have a proper grip on your pistol when aiming downrange. The front sight dot should be placed center mass on your target. For marksman concerned with precision, cover the spot on your target you are aiming for with the front sight dot. Remember, the key to accurate shooting is “aim small, miss small.”
Common Problems With The 3 Dot Sight
Shooting with the 3 dot system is not without it’s limitations for the novice shooter. While effective for self defense, and close quarters shooting, the 3 dot system is not overly impressive with distance shooting. Furthermore, while this type of sight is sufficiently accurate for most amateur shooters, it does not rival more sophisticated sighting methods, such as a red dot sight.
Three-Dot Sight Enhancements and Variations
Typically, most pistols come standard with both front and rear dots that are white. This does not offer a significant contrast, but many shooters find the stock 3 dot system sufficient. Although most pistols come with a 3 dot system, there are enhancements.
First, there are 3 dot sights with varied dot sizes and colors to provide greater contrast and assist shooters when aiming. However, some 3 dot sights provide customization of the dots style beyond size and or color variations. One example is a fluorescent outer ring as opposed to a solid colored dot.
Additionally, there are also tritium sights or night sights. These platforms glow in the dark and provide a working 3 dot sight for use in low light conditions. If you’re wondering about the benefits of this system, check out this article.
Adjusting Your Sights
If you have familiarized yourself with the proper way to aim and shoot using a three-dot sight but are failing to accurately place shots, then your sights may need adjustment. However, before moving onto sight adjustment, you should ensure the following:
- The groupings are tight and consistent (e.g. always missing high on the target)
- Shots from the pistol are fired from a supported position (e.g. on a shooting bench)
- Choose a distance for sighting in your pistol (e.g. slight variations can be expected between shooting a target at 7 meters vs. 21 meters)
When To Adjust Your Sights
If you’re using proper technique and your shot placement is still off, then it may be time to adjust your front, rear, or both sights. However, you should eliminate as many variables as possible before making any sight adjustments.
If your shot placements are all over the place, then it is likely a problem with your grip, trigger pull, shooting stance, or other factor. When you are shooting, you should consistently miss in one location. Try to eliminate as many other factors as possible.
- Shoot from a stable supported position – this will eliminate vertical movement due to weak muscles in the forearm
- Choose the distance you are sighting your weapon for – A pistol that consistently shoots high may be sighted in for greater distance
- Stage your trigger – eliminates point of impact variance due to long trigger pulls on double action pistols
How To Adjust Your Sights
Before you begin moving your sights, you’ll need to understand what you are trying to correct. If your point of impact is left or right of your point of aim, then you’ll be adjusting the windage. However, if you’re adjusting the vertical point of impact, then you’ll be messing with the elevation.
You should correct any issues with windage before moving on to adjust elevation. Therefore, the point of impact of your rounds should be in the center line of your point of aim. Once you have corrected windage issues, you can move on to adjusting the elevation.
Depending on your individual weapon, you may not be able to adjust both the front and rear sights. However, a good rule of thumb is the F.O.R.S. sight adjustment method.
F – Front
O – Opposite
R – Rear
S – Same
The acronym refers to where you WANT the bullets to go, not where the bullets are currently going. Depending on which sight you are adjusting, you need to apply the appropriate rule.
Adjusting The Front Sight Post
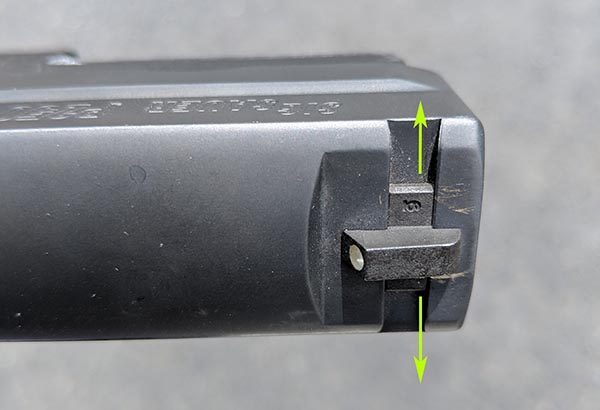
Adjusting your front sight may require a specialized tool to push the sight left or right. Above is a picture of my front sight. The sight post moves laterally within the grooves. Adjusting the elevation is not usually accomplished using the front sight. However, to correct windage issues, you can adjust the front sight.
For example, if your shot placement is consistently right then you WANT the bullets to go left. Using the FORS adjustment method, you would move the front sight post to the right because it is the OPPOSITE of where you want the bullets to impact. By moving the front sight to the right, you’ll need to move the muzzle to the left to achieve a proper sight picture.
Adjusting The Rear Sight
Adjusting the rear sight may require you to loosen a screw, or push the sight. Consult your manual for proper adjustment technique for your model of pistol. Using our example above, lets examine how we would correct the windage.
Because our point of impact is consistently right of our point of aim, we WANT the bullets to go left. Using the FORS adjustment method, we would move our rear sight to the left which is the SAME direction we want the bullets to impact. Doing this requires you to move the barrel to the left to achieve the proper sight picture again.
Now that we know how to correct windage, lets discus correcting elevation issues. Most pistols correct elevation issues using the rear sight. Let’s say you are consistently missing low on your target, and you WANT the bullets to impact higher on the target. Using the FORS sight adjustment method, you will need to move the rear sight in the same direction which is up. Doing this will require the muzzle to be elevated to achieve proper sight picture.
How Much Should You Move Your Sight
Calculating how much to move your sight will depend on a number of factors, including the distance you are sighting your weapon in for and the sight radius. Technical specifications may be available for your model in the manual. While adjustments may vary, you will only need to move your sights a fraction of an inch to correct the point of impact.
If you are looking for a math equation on how much to move your sight, you will need to know three of the four following variables.
A – How much to move the sight
B – Distance to change the point of impact
C – Sight radius (distance from front to rear sight)
D – Distance to the target
All distances should be measured in the same increments (e.g. inches). The equation to use is:
A/B = C/D
As an example, lets say our point of impact needs to move 2 inches to be on target. And our sight radius is 5 inches. Finally, our distance to the target is 240 inches (i.e. 20 feet).
A/2 = 5/240
A = (5 X 2)/240
A = 10/240
A = 0.041 inches
Therefore, you would need to move your sights .041 inches to place your shot accurately for a distance of 20 feet.
Parting Shots
There are 3 important things to remember when learning how to aim a pistol with 3 dot sight. First, ensure that the front dot is centered within the two rear dots. Next, ensure that the tops of all 3 dots align. Finally, make sure your focus is on the front sight when aiming down the pistol. Once you’ve mastered these 3 pieces, your marksmanship should improve drastically. Remember to take your time, and speed will come. If you have any tips to share with readers, please leave a comment.


